Once FreeRADIUS has been configured to use PAP, it is straightforward to configure the server to use EAP for authentication. This article will walk through all the necessary steps.
Step 1: Install OpenSSL
In order to use EAP authentication with the server, you will need to install OpenSSL. This includes any development libraries and headers, such as libssl, and libssl-dev
If you do not have the required libraries and headers installed, then the server will still build, but many EAP types will not work.
If PEAP or TTLS do not work for you, then run the server in debugging mode with radiusd -X, and look for an error message such as:
Ignoring EAP-Type/PEAP because we do not have OpenSSL support.
If you see a similar error, then you will need to re-build the server with OpenSSL support.
If the above error does not appear in debug mode, then something else is wrong. The usual suspects are the server certificate (see the EAP problems page), or the user’s password is incorrect.
Step 2: Create dummy certificates
After installing OpenSSL, you need to create certificates. To get started with EAP configuration, we recommend creating dummy certificates for testing purposes. These certificates have the proper form, if not the proper content.
$ cd /etc/raddb/certs
$ make
These certificates can be used for testing authentication, but they cannot be used in a production environment. For the purpose of the simple tests in this document, they are good enough.
Step 3: Configure 802.1x authentication for this SSID
Next, configure 802.1X authentication for this SSID. On Windows, you will need to un-check the Validate Server Certificate option in the 802.1X supplicant (e.g. Windows laptop) strictly for testing. You will also need to specify the authentication mode to be User Authentication.
These options are a little bit buried in Windows 10 so we’ll walk you through how to get there.
1) On the supplicant desktop, click on the wireless icon at the bottom right corner. Select Open Network and Sharing Center.
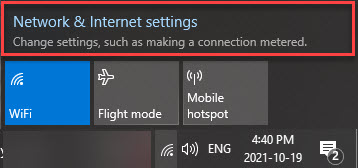
2) From the Network Settings screen, choose Network and Sharing Center.
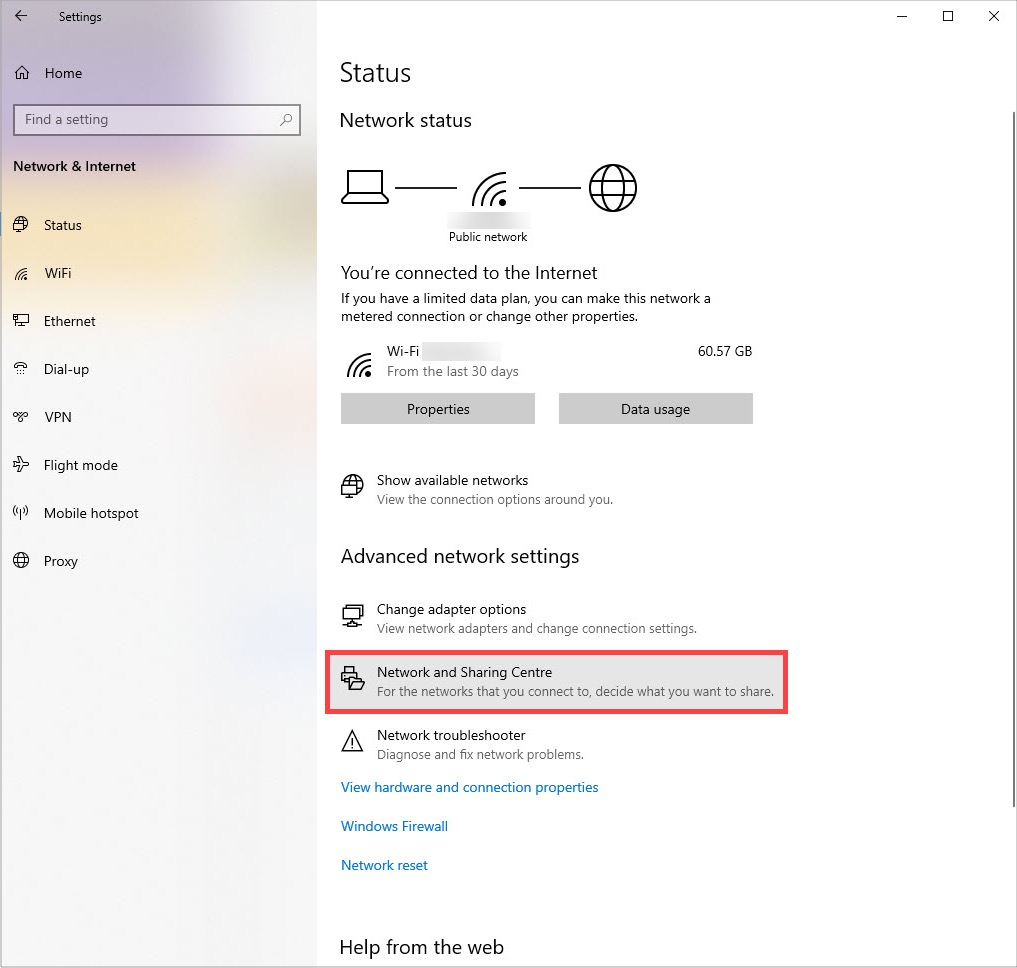
3) From the Network Sharing Center, select Setup a new connection or network.
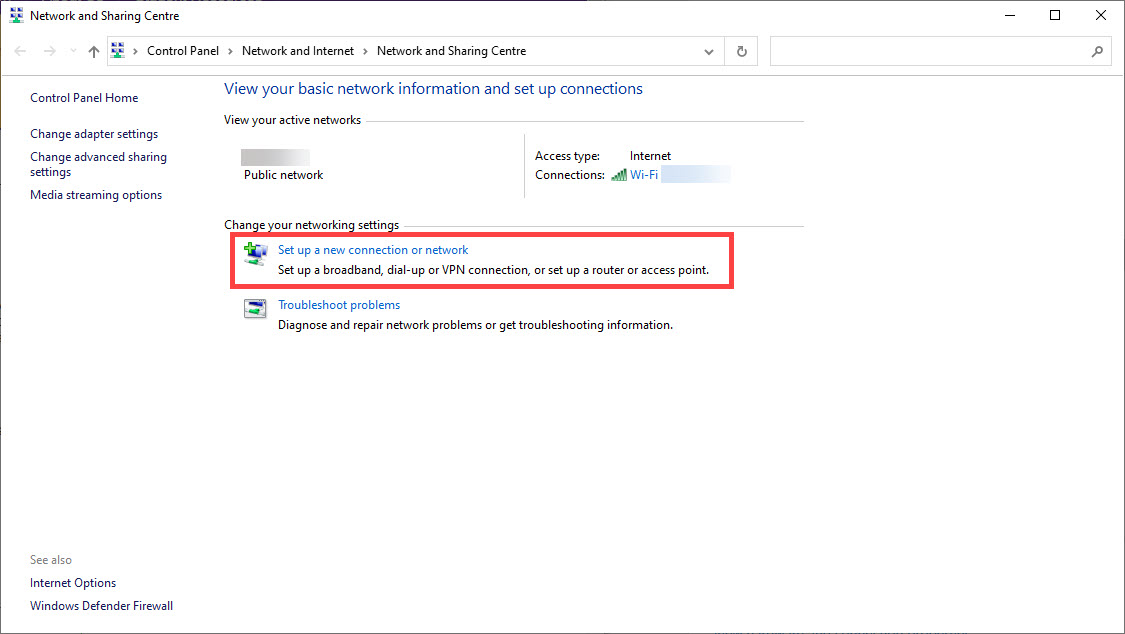
4) Select Manually connect to a new network.
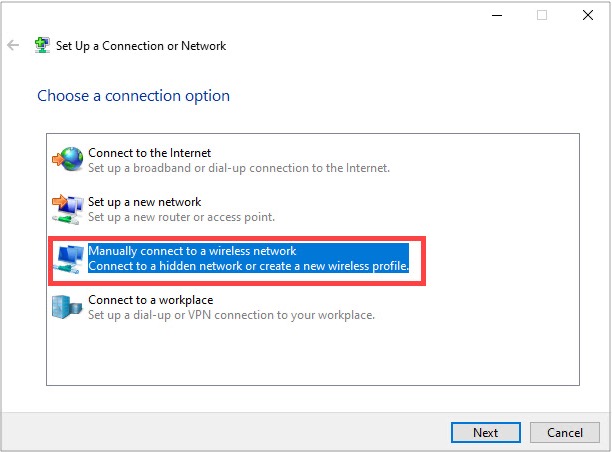
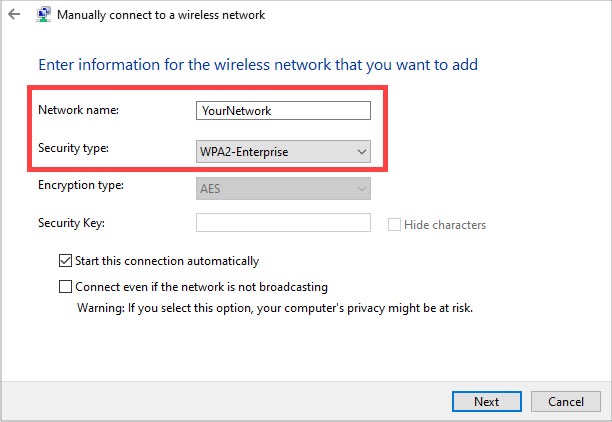
5) Enter the information for the network you are trying to connect to.
- Network ID: the SSID of the network you want to connect to
- Security type: WPA2-Enterprise
- Encryption type: AES (this will be automatically selected, as it is mandated by EAP standard)
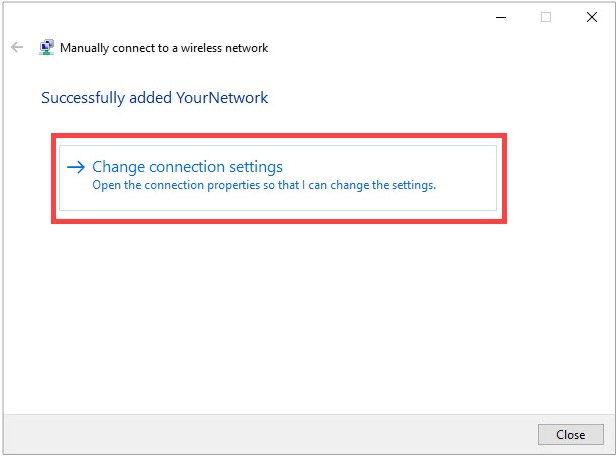
6) Select Change Connection Settings.
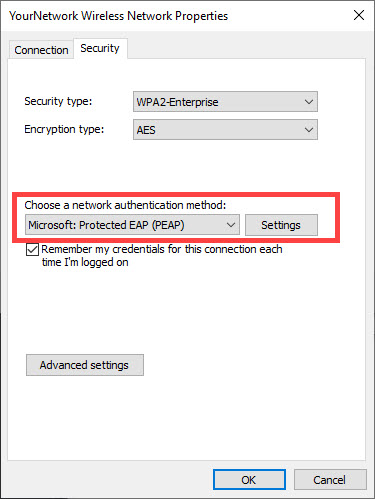
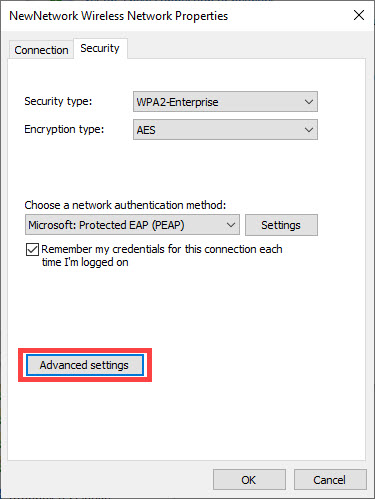
7) Click on the Security tab at the top of the window.

8) Change the Choose a network authentication method to be Microsoft: Protected EAP (PEAP) then click on Settings.
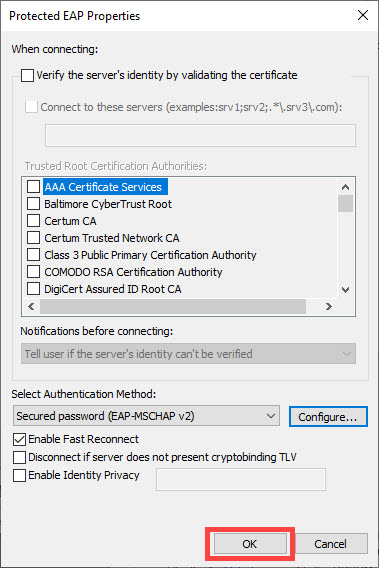
9) Uncheck the Validate server certificate box. Then click Configure.
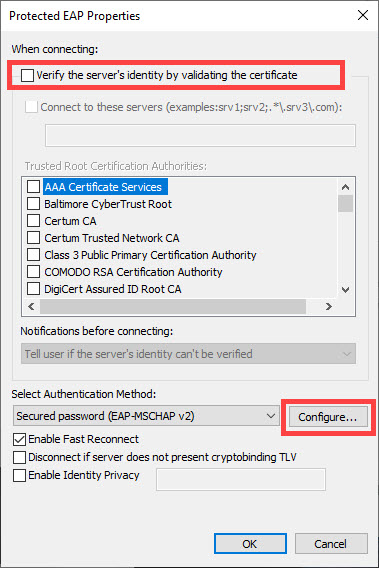
10) Uncheck the Automatically user my Windows logon name and password and click OK.
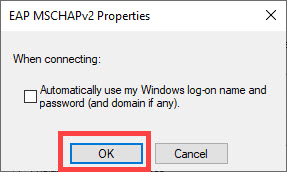
11) Click OK again.
12) Click the Advanced Settings button.
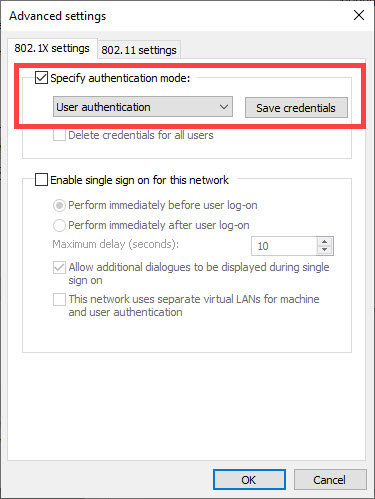
13) On the 802.1x settings tab, check the Specify authentication mode box and set the mode to User authentication.
Other supplicants (e.g. Mac OSX, or wpa_supplicant) use different methods for permitting the use of an unknown certificate. See their documentation for more information.
Step 4: Test it
Start the FreeRADIUS server using radiusd -X, and wait for the debugging text to stop scrolling by. The final line of text should be:
Ready to process requests.
Then, login using the user name and password from the PAP howto. (Which we assume you have already followed.) If all goes well, the server should send back an Access-Accept packet.
When the above method is used, the following authentication types should just work:
-
PEAPv0
-
- EAP-GTC
- EAP-MSCHAPv2
-
EAP-TTLS
-
- PAP
- CHAP
- MS-CHAP
- EAP-MD5
- EAP-MSCHAPv2
At this point, there are only a few things that can go wrong. See the EAP problems page for some common problems and solutions.
Step 5: Create production certificates
Once this step works, you can proceed to creating the production certificates.
Step 6: Import the root CA
The final step to configuring EAP for FreeRADIUS is to make sure the root CA (Certificate Authority) is added to every client performing EAP authentication in your system.
Need more help?
Network RADIUS has been helping clients around the world design and deploy their RADIUS infrastructure for 20 years. We specialize in complex systems and have seen pretty much every variation and problem out there. If you want help from the people who wrote FreeRADIUS, visit our quote page to contact us for a consultation.